5 MORE Tips For Making Scrap Quilts

To watch the video on this topic, click on the image above or click HERE.
Welcome to the second blog/series where we discuss Five MORE Tips for Making Scrap Quilts! If you haven’t read the last blog on this, click here. If you want to see the first video, you can find that here.
What are some more tips? Let’s get started!

Tip 1: Embrace Variety:
Scrap quilts give the perfect opportunity to bring together many different prints with different scales, patterns, and textures. When florals, dots, stripes, plaids, etc. are brought together in one quilt, the blocks just sparkle! Varying scale (the size of prints) can also make your scrap quilts pop. This is a wonderful way to add some excitement to your scrap quilts.
This old scrap quilt is the perfect example of this. If you want to learn more about this quilt, click here for the Lessons from an Old Quilt video on this one.

Tip 2: Maximize Big Prints:
Speaking of scale (see Tip 1), I like big prints and I cannot lie (I couldn’t resist!).
Big prints are great in scrap quilts because you get more bang for your buck! You can pull different sections/colors to control the look you want simply by cutting those sections in a way that allows you to maximize the large-scale prints.

Tip 3: Use Both Side of Fabric:
If a certain fabric doesn’t work, try flipping it over. I love doing this, and do it often, not just in scrap quilts, but in all quilts. Take, for example, my video on the $20 quilt. I didn’t like the navy blue fabric. It was too dark for the look I wanted. What did I do? I flipped it! I love how it goes with the rest of the quilt now. It almost looks like denim.
This is especially useful in scrap quilts when you are working with tone, value, texture, and even scale in some cases. One of my viewers once said, “You pay for both sides of the fabric, You should use both sides.” I love that! It is so true! So, make sure to look at both sides of the fabric when planning your scrap quilt! It works!

Tip 4; ALWAYS Make a Sample Block:
I could make the argument that this is probably my best tip for all quilt makers, but it is especially true for scrap quilts. Making a sample block—even though it is an extra step—could save you time, energy, and fabric. A sample block allows you to see how a block is constructed; see how fabric(s)/colors work together; and allows you to determine the best placement for fabrics. These, of course, are only some of the benefits. There is a caveat, however. If you don’t use the sample block in the quilt, you will have a ton of sample blocks (stray blocks) in your stash. To me, it is worth it. It has saved me so much over the years.
In the photo you can see allllll of my sample blocks I have made over the years. Yikes!

Tip 5; Plan More Scrap Quilts While Making Scrap Quilts:
Let’s just get this out of the way: it never ends. When we make quilts with scraps, we make more scraps for quilts. So why not optimize the experience? Plan your next scrap quilt that you will make from the scrap quilt you are making while making your scrap quilt! I know, I know—you will have to read that sentence a few times. :)
Let me give you an example to help clarify what I mean. I made this house quilt (video to the tutorial here). As you can see, the roof units are flying geese. When I was making all of the flying geese units, I simply sewed an extra seam to get two half-square triangles from each flying geese unit. I will take those half-square triangles and use them in a new scrap quilt.
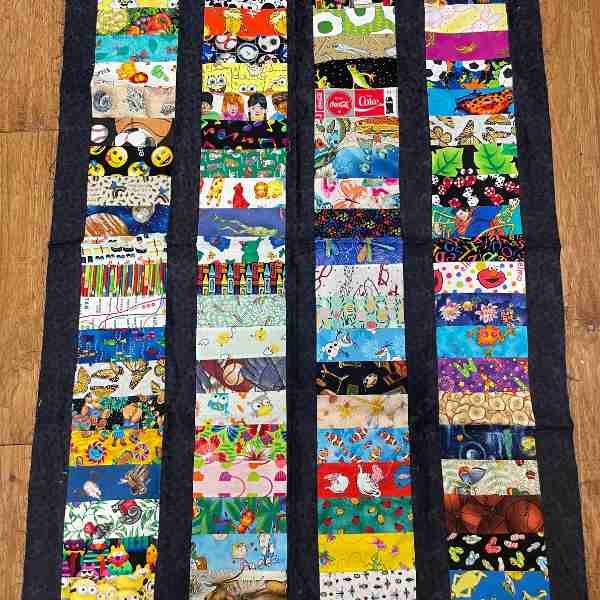
BONUS Tip 6; Use Sashing as an Anchor:
One of the best ways to create continuity in a scrap quilt—at least in my opinion—is to use the same color sashing strips. It makes the quilt look like it has some order. I have two examples of this. In the first one, the Coin I Spy Quilt (video here), I used a black sashing to offer an anchor in this otherwise busy quilt. In the second example, I also used the same sashing to create a balance with all the mixed matched blocks.
Let me know your favorite scrap quilt making tips! I would love to hear them!
Happy Piecing!
Kris